|
Foreword:
I don't drink alcohol. I'm not against drinking, I simply don't like it. I borrowed these bottles so I have no idea how good the wines are/were.
Capturing the Image
Overview:
This page will cover basic photography of a wine bottle for beginners using simple point and shoot type cameras (a Canon S3 was used here). These are generally technical photos, not artsy type photos. Using these techniques, you should be able to get reasonably good photos to use on web sites or for eBay. No external flash was used and no diffuser was used. The on-board flash was used at full power for all shots unless otherwise noted. The distance between the camera and the bottle was approximately 6ft. No accessory lens was used. Some of the images that are being used to show you the setup will seem dark but it was necessary to capture the image without blowing the white areas out. The backgrounds are bright white by design. We want them to be blown out when photographing the bottles. This will make the removal of the background much easier.
Camera Setup:
None of the EXIF information has been stripped from the photos. If you're curious about the camera settings, drag any of the photos into your favorite photo editor and view the settings. IrfanView makes this very simple. Drag into IrfanView, click the INFORMATION button, click the EXIF button.
From Awful to Reasonably Good...
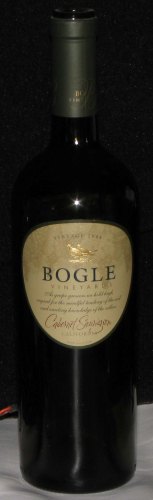
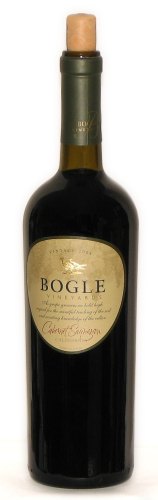
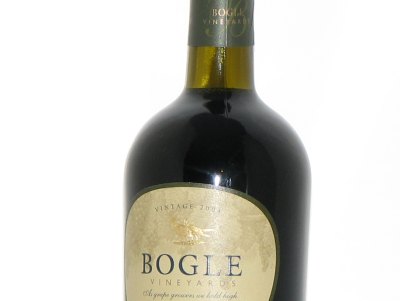
So you aren't too discouraged (assuming that you've had a few failures photographing bottles), the next two photos show what I began with and what was produced with a bit of trial and error. The first image was not taken for any specific background (it was an early test photo) so it's shown on the gray background of the web page. The right photo was produced specifically for a white background so I placed it in a white cell (the two photos are the same width). On the left photo, you can see that there are several problems. There is a white line on the lower part of the bottle, the flash shows up as a flare and the bottle is difficult to see on the black background. The image on the left is absolutely awful and I've actually seen worse images on various sites.
|
|
|
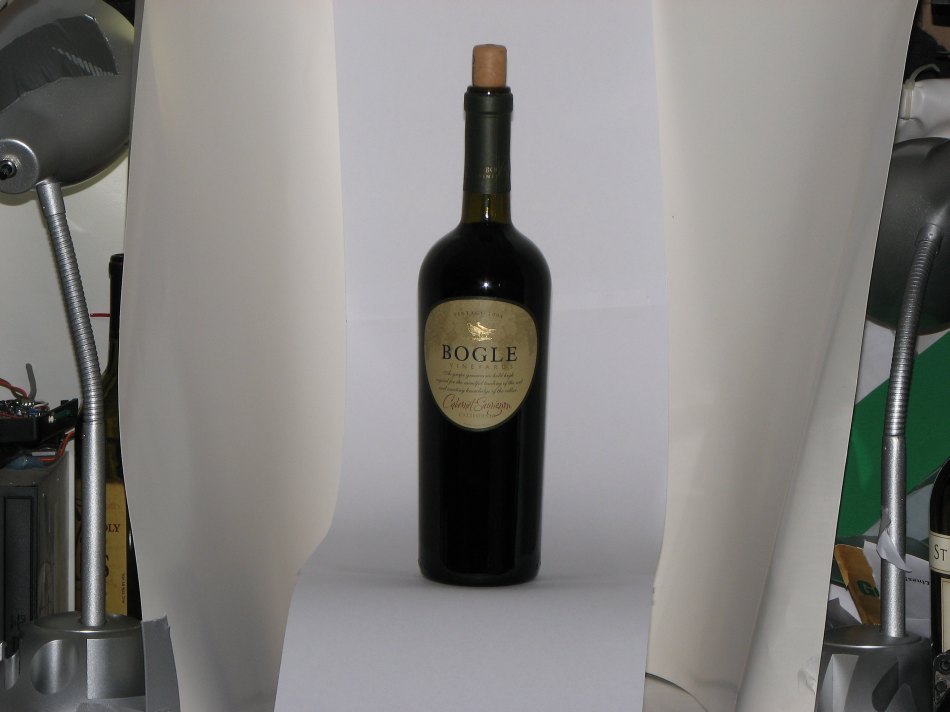
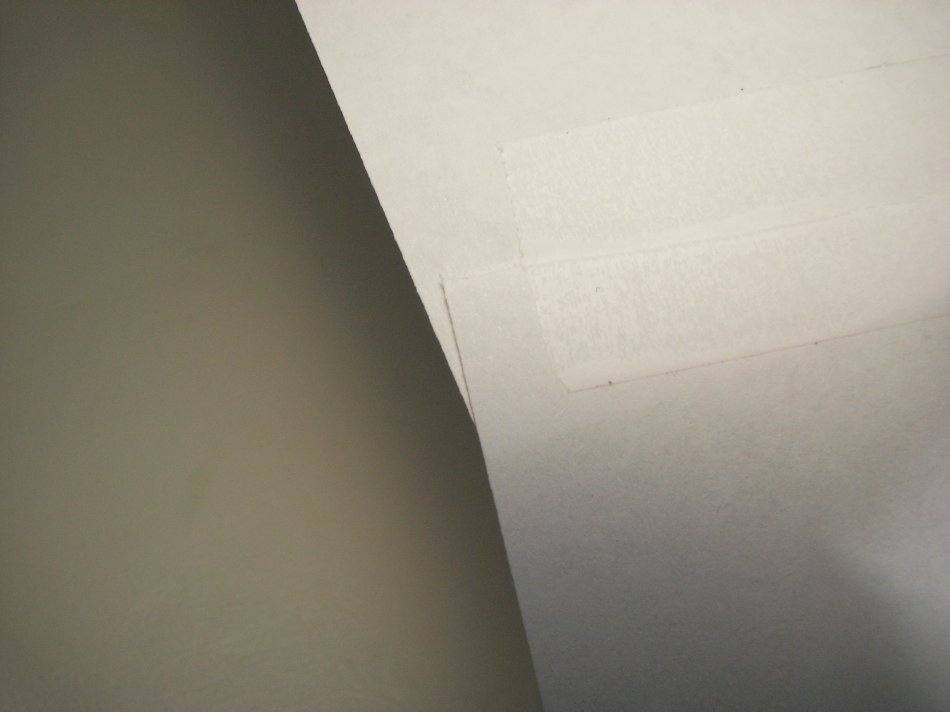
Avoiding the White Line:
If you're photographing this for a white background (the most common background color for commercial sites), you'll likely be photographing this on a white surface. To prevent the white line, the bottle has to be on the edge of the surface (difficult for post production/editing because there is a sharp change in the surface). A better solution is to have the surface sweeping down in front of the bottle. The following image shows the basic idea. Sometimes the white line is due to the texture on the label of the bottle. Moving the camera up or down can often reduce or eliminate that problem.
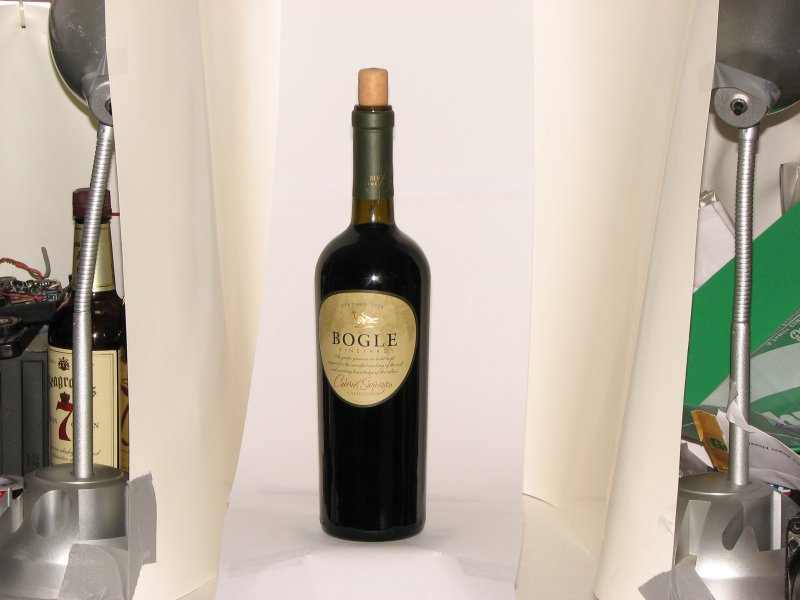
The Setup:
The setup above is nothing extravagant. I used two pieces of poster board taped together to provide a large, sweeping white background (no lines or harsh dark areas). I taped the background to my two desk lamps for support. This worked out well because I could use them to provide enough light for the camera to focus. The white vertical sweep is simply 3 sheets of legal printer paper taped end to end. The side facing the camera needs to be taped across the entire width to prevent shadows.
Reducing Reflections From the Sweep:
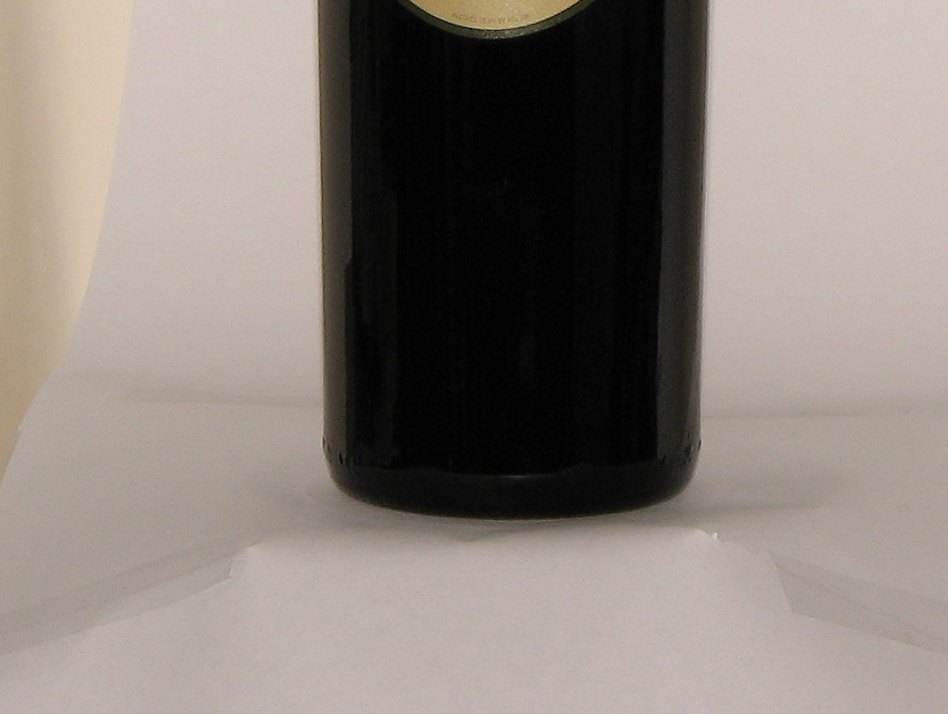
If you look closely at the bottom of the bottle, you can see that there is a second reflection (other than the long vertical reflections from the poster board). If you don't want this to show up, you need to make the sweep fall away on the sides as well as the front.
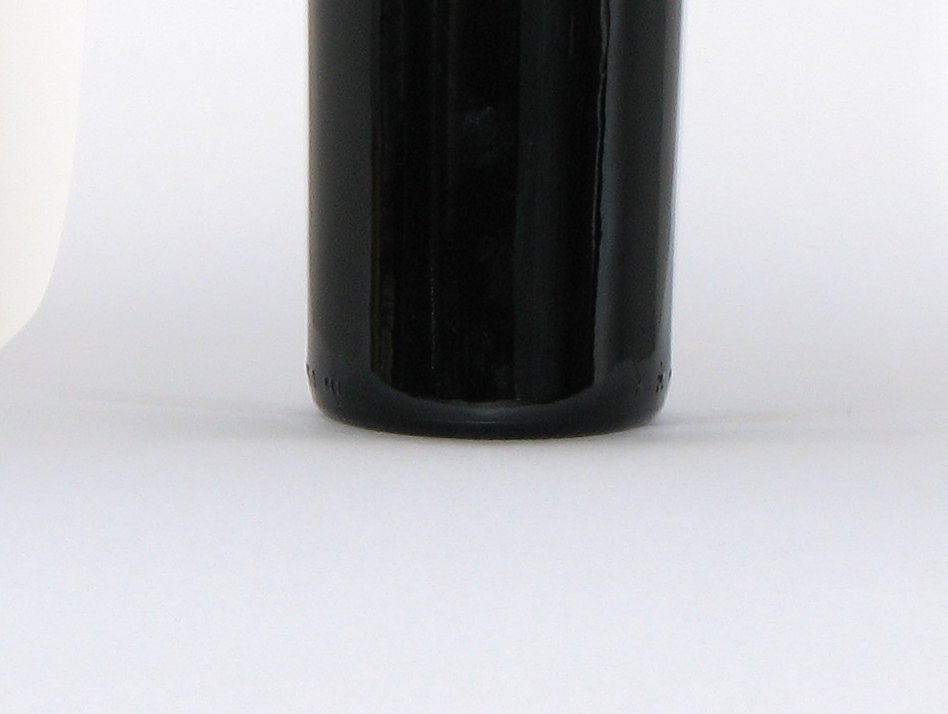
The photo below shows the difference when the sweep is slightly modified. I cut the sweep just in front of the bottle. There are two cuts. Each is ~1/3 the width of the piece of paper. After cutting the paper, I pulled the front edge back so it overlapped the paper ~3/4" like THIS. This allowed the paper to curve downward on the sides of the sweep. The following photo shows that the lower reflection is essentially gone.
Notes:
- If you look closely at the lower corner of the left-side reflection of the poster board, you'll see a 'notch' in the white line. This is from a piece of gaffer's tape on the edge of the poster board. Use clear tape on all areas that will be inside the stage.
- When I cut the paper to produce a sweep on the sides, I had to change from a square riser to a round one (a narrow square/rectangular one would have worked also). I used a cover from a CD cakebox.
Placement in the Stage:
The placement from front to back in the stage area will make a difference in the reflections in the bottle. I used the sweeping white poster board to minimize reflections from other objects. If you look at the sides of the bottle where it it transitions from the neck to the body of the bottle, you can see the white reflection of the poster board. In my opinion, all you want is enough of a reflection to show the shape of the bottle. The bottle on the left below was set too far back into the stage and too much of the front of the bottle is washed out. There is essentially a narrow dark strip down the front of the bottle. The one on the right was very nearly out of the stage. The back of the bottle was ~1/4" inside the front edge of the poster board background. You'll have to adjust depending on your needs/setup.
|
|
|
Minimizing Reflections on the Front of the Bottle:
To minimize the reflections on the front of the bottle, I had no room lighting other than the single desklamp (with a 100W equivalent 5000°K CFL). Since the flash is of limited power and generally directed forward, other objects in the room received too little light to show up clearly in the bottle.
Getting the Overall Lighting Right:
When using this setup, you'll need to set the camera to the manual or custom mode. Get the settings close to what you need in manual mode and then save the settings in the menu (last item - click one up instead of many down to get to it). From that point, use the custom setting. It will retain the preferences you set. To get the lighting right, you will need to change the aperture. You could change the flash power settings but there are too few choices in manual mode. If the lighting is too bright, you'll need to go to a higher F-number (a smaller aperture). On the S3, the aperture is changed by pressing the up/down arrows on the 4-way rocker switch.
White Balance:
To get the white balance right, you may have to try several settings. Get everything else right and then work to get the proper white balance. Remember, you want the white background to be white or a light gray. If it has a color cast for some reason, try a different white balance. The choices you should try are Auto, Flash and Custom. This is covered on the main page of the tutorial.
Post Processing
Virtually all photos will require a bit of post-processing to get them as good as they can be. Essentially all of the post processing is going to be done with the GIMP. It's free and everyone has access to it. If you're not familiar with the software, take a few minutes to go through the GIMP tutorial I began creating. It won't cover everything but it will allow you to see the overall layout and how it functions.
First, we'll need to crop the original (reduced in size for the pop-up window). To crop in the GIMP, go to TOOLS >> TRANSFORM TOOLS >> CROP AND RESIZE. Select the area you want and select CROP in the dialog box.
|
|
|
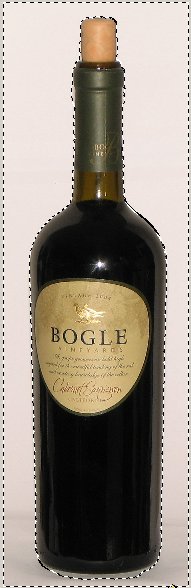
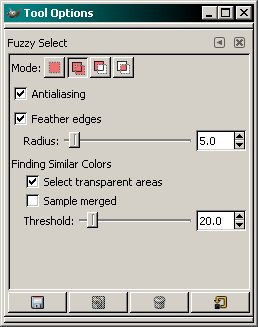
On the far left you can see what the selected image looks like. In the center, you can see the settings for the fuzzy select tool. When we capture the image, we want a uniform background. It makes it easier to select it without selecting any of the bottle. To get the fuzzy select tool, go to TOOLS >> SELECTION TOOLS and choose FUZZY SELECT. When on the page with the photo (which should be maximized at this point), go to DIALOGS >> TOOL OPTIONS and the options dialog box will open for the fuzzy select tool (this works for all of the tools).
Using the settings shown, it should only take a few clicks to select the area as shown. You can set the zoom to a higher percentage to see the areas that weren't properly selected. You'll use the tool again to select those areas (you may have to hold down the shift key while selecting). Here, the shadow for the lip of the bottle was not selected. I chose to get rid of it so I zoomed in and selected those areas (both sides of the bottle).
To prevent having a sharp line of demarcation around the bottle (which could make it have a ragged edge), I used the feather option in the selection options (SELECT >> FEATHER...) and set the feather value to 50. For large (high resolution images), you'll need to use a relatively high number. This image hasn't been reduced to something usable in a web page (currently 556 x 1754 pixels) so I had to use a high value. In the image I produced using a C-740 (shown near the end of the page), I had to reduce the feather value to 10 to get good results.
|
|
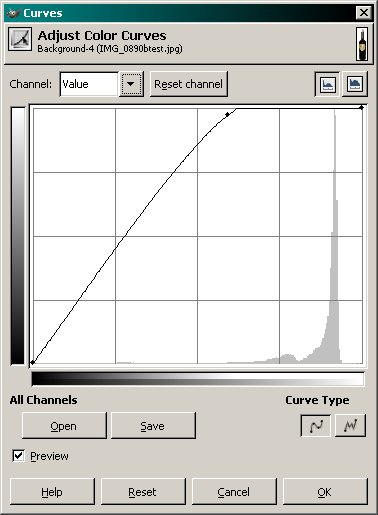
The photos below show the results from using the curves tool on the selected area. I pushed the curve up so that all of the brightest areas were pushed to clipping (full, 100% brightness - pure white). I could also have used the clear command (EDIT >> CLEAR). If I would have only wanted to make the background perfectly gray (no color cast), I could have used the color saturation tool and set the saturation to the absolute minimum setting (-100). If the photo was going to have a border, the light gray background would have looked OK on virtually any color web page.
|
|
|
|
|
You're likely wondering why the selection area is no longer shown (as it was in the previous image). I chose not to show it so I could better see how the area looked as I made the changes. This option is in the VIEW section on the toolbar.
|
OK, there are a few more problems I wanted to fix. The flash has produced a flare in the bottle. This can be avoided by the use of slave flashes and large reflectors/diffusers but we're trying to keep this simple and inexpensive so we used the on-board flash. To remove the spot, we need to fill that area. If you haven't done so yet, go to SELECT >> NONE. Now go to TOOLS >> PAINT TOOLS >> CLONE. In the tool options dialog box, select the largest available fuzzy brush. The fuzzy brush will give softer edges and the repair will be less conspicuous. The clone tool copies one area to another area. Hold the CTRL button down (on your keyboard) and click an area of the bottle directly under the bright spot (below the label). Release the CTRL button. Now move the cursor to the bright area and color the area of the bright spot. If you make a mistake, CTRL+Z will undo it.
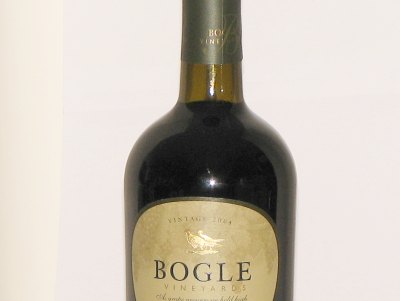
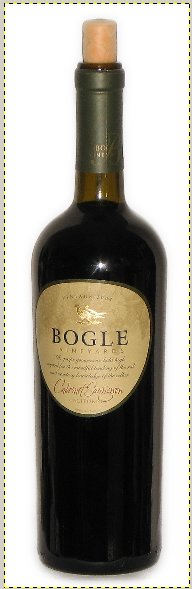
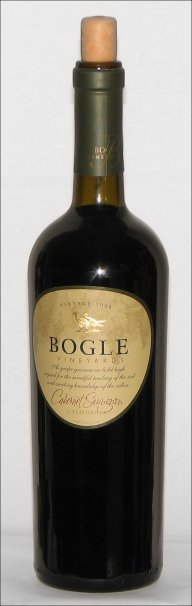
As I showed you at the top of the page, the image below is the finished product. If you want to see it full size (if your browser doesn't resize it), click HERE.
Not Very Time Consuming:
Bear in mind that all of this takes just a minute or two when you capture a good image and become familiar with the software. It literally took only 7 clicks to capture the desired area for editing.
Using a Different Camera:
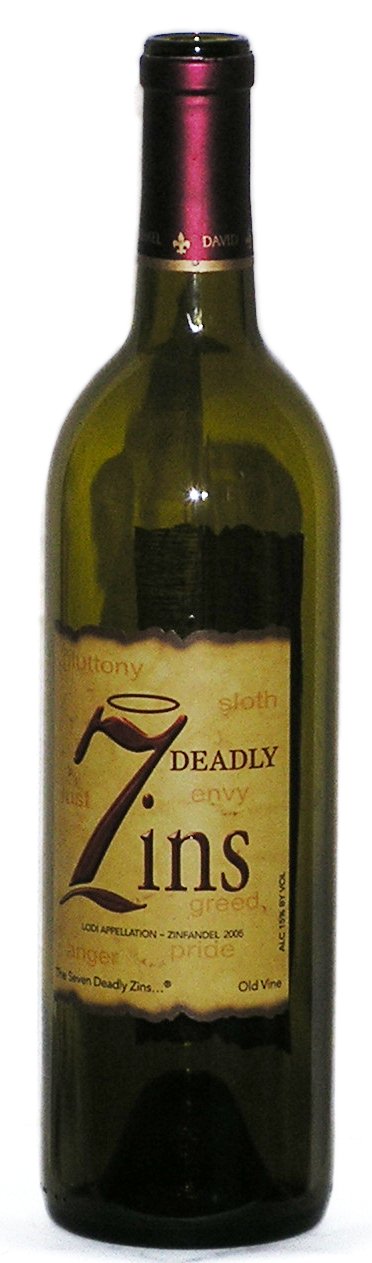
As a test, I set my old Olympus C-740 on the tripod and took a photo of a different bottle to see how it would turn out. I didn't fix the bright spot caused by the flash but you can see the overall image isn't too bad. This shows that a sub $100 camera (used, on eBay) can produce usable images with this setup.
Conclusion:
Now I know that someone with a high-dollar DSLR, an expensive multi-flash setup, and large diffusers can produce better images but this was done with an inexpensive point and shoot camera and less than $10 in supplies. You can produce similar results. Don't be discouraged if the first few shots are not what you want. I took MANY poor quality photos during the few days I worked on this. The final setup should be easy enough for anyone to reproduce.
|