|
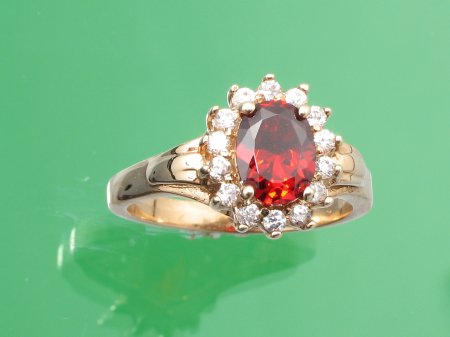
Opinions vary on what's desirable when photographing jewelry. Some believe that there should be absolutely no reflections from the surroundings. This may be desirable for some jewelry but in my opinion, it leaves smooth, shiny metallic objects looking flat and uninteresting. I'll show several different ways to photograph one particular piece. From what I've seen on eBay, more than a few sellers need to view this page. :)
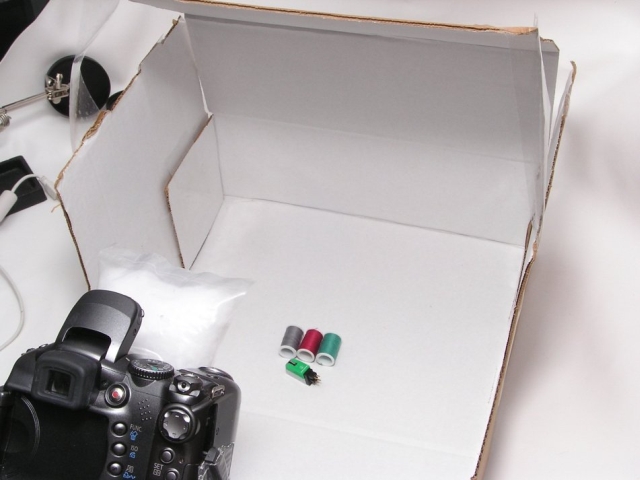
If you try this and believe that you want to persue jewelry photography, you can look to more professional tents and enclosures but this will allow you to try something new for just a few dollars. If nothing else, it will allow you to determine if the equipment you have is up to the task. Here I used my Canon S3 and a Raynox DCR-250 close-up lens unless otherwise noted.
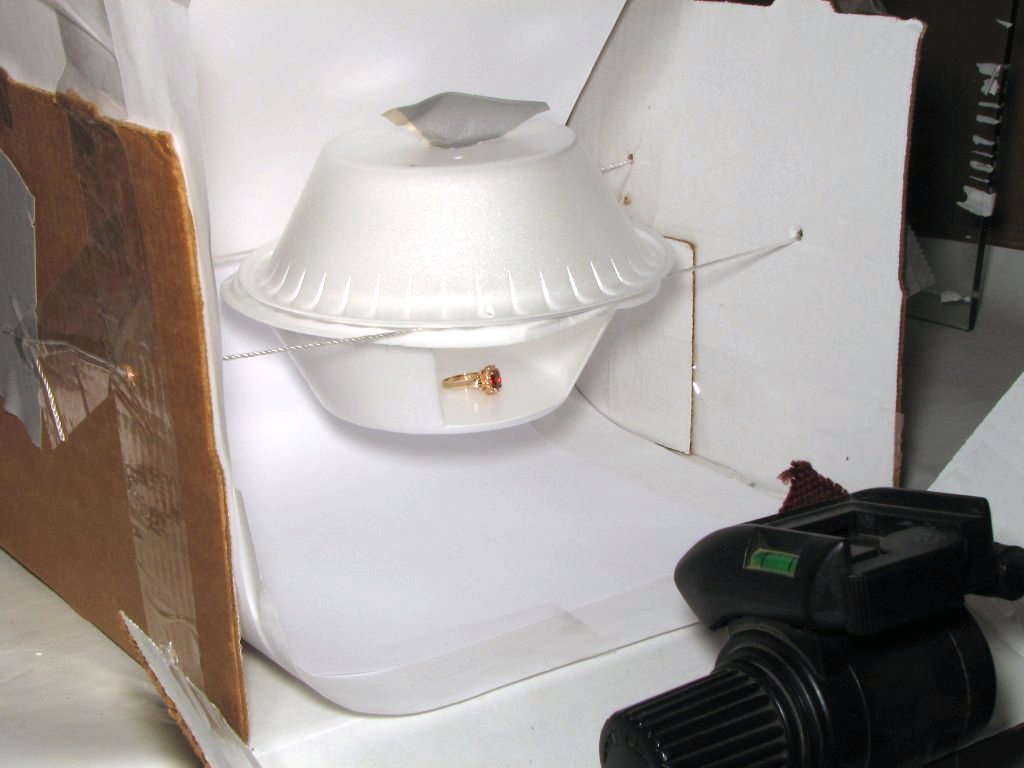
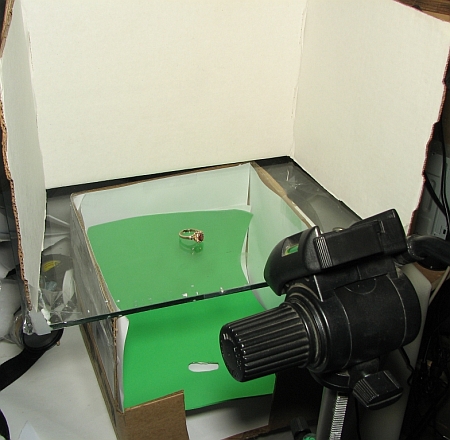
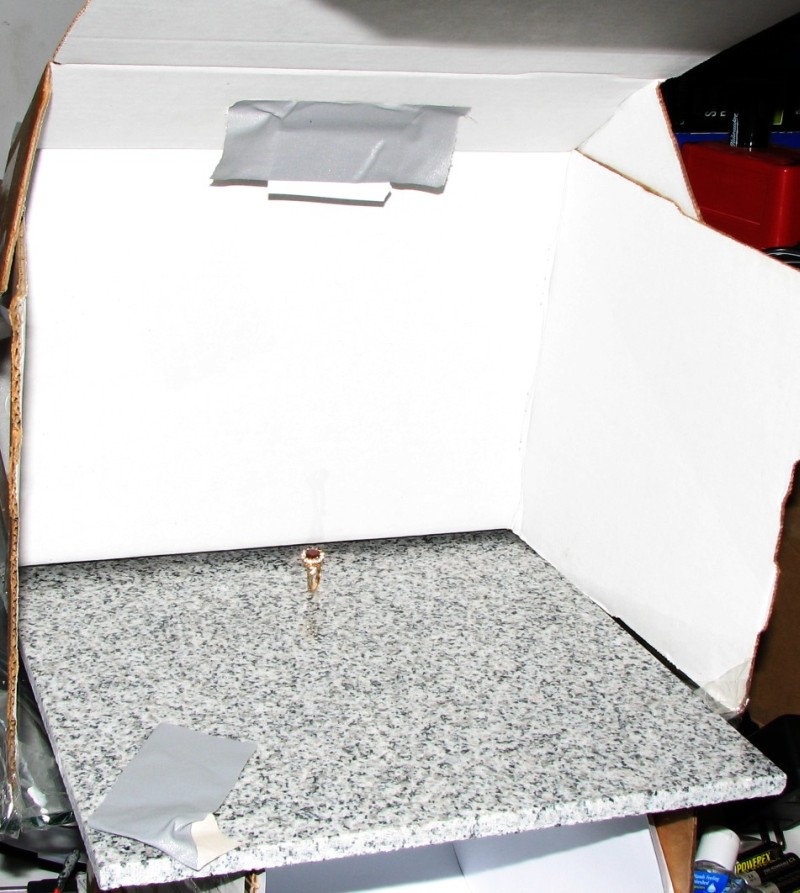
If you've found this site from the home page (Basic Macro Photography), you've seen the white box enclosure I used. This adds to that enclosure. You've also seen the bowl type diffuser. This uses the same bowls as a shooting stage/diffuser. I've suspended the bowls to allow light to enter the bottom of the bowl. This further reduces the shadows. The bottom bowl is attached to string (with clear packing tape) that is attached to the side of the enclosure. The tape on top of the upper bowl serves as a handle. A handle made of clear tape may have been better because it wouldn't block any light but I didn't see any shadows with the gray tape.
As you'll see in the next few examples, different conditions/techniques result in varying color balance and brightness. If you capture a good quality image (in focus, no blown highlights and otherwise good exposure), you can repair minor problems in Photoshop or the GIMP.
|
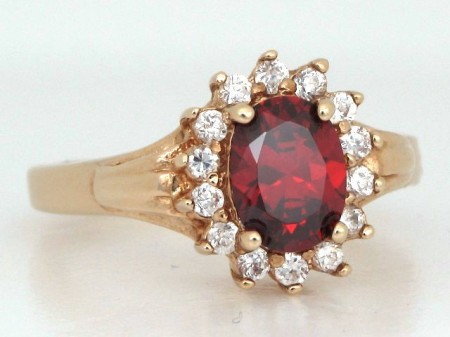
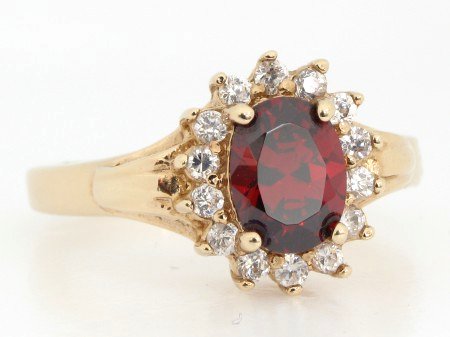
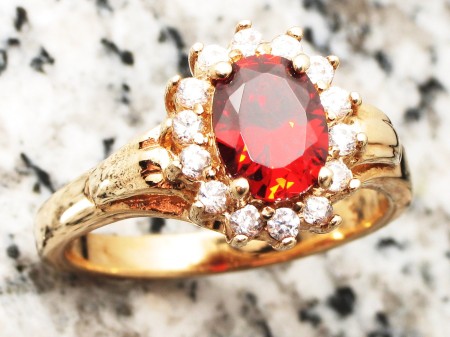
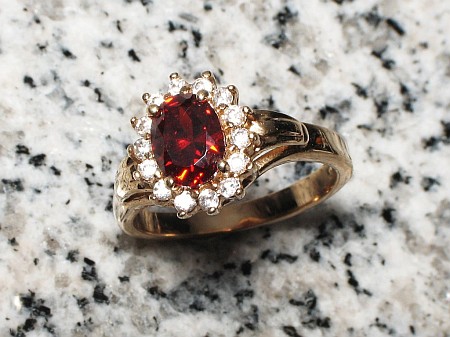
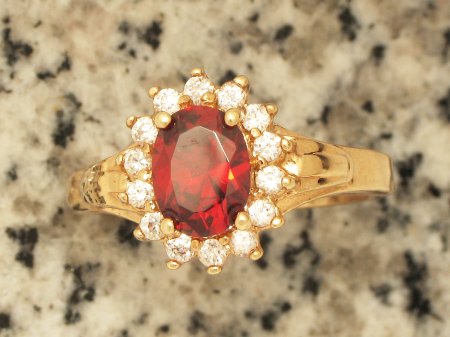
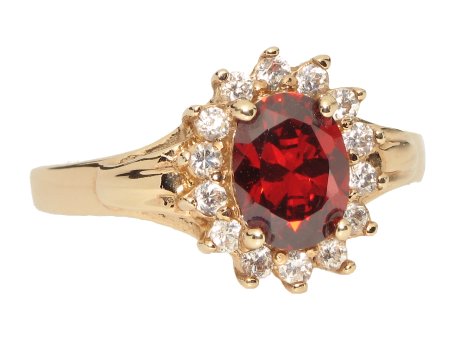
Here, you can see an image taken with no flash and with as few reflections as I could get. I cut a small hole in a sheet of paper and shot through the hole so there would be no reflection from the camera. Technically, it's not a bad photo. It's in focus and has relatively good exposure, contrast and saturation but it's not appealing. If you're taking photos for insurance purposes, this may be OK. If you're competing with other sellers, this won't get the job done.
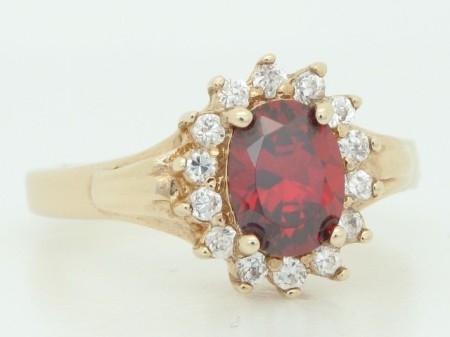
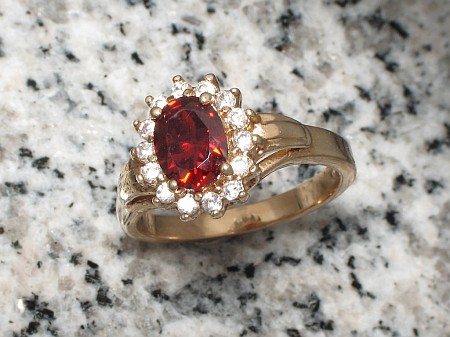
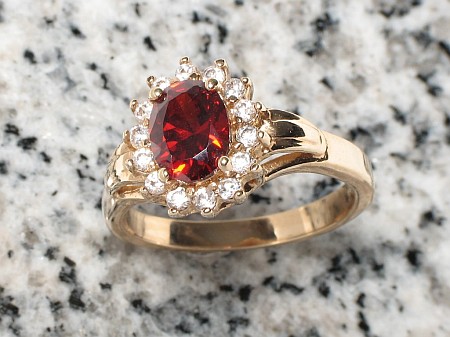
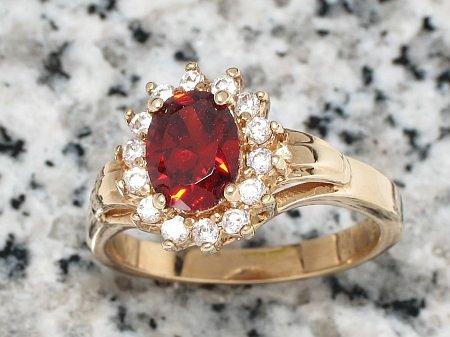
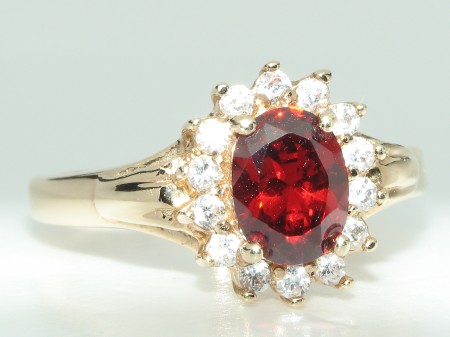
This was taken with no flash and custom white balance to compensate for the ambient fluorescent lighting. The exposure value was set to +1.75. The the image would have been darker if the EV was set to 0 (normal). The reason it's so dark is that the CZ stones had some facets that were reflecting a lot of light back to the camera. It used the brightest of those points as full white (as bright as it can be). Actually, at +1.75 EV, it likely caused a few areas to be blown out (areas that would have been light gray were pushed to being white).
The photo on the right was edited in the GIMP using the levels tool and making a slight color balance adjustment using the gray point tool. This is the case for each of the next 4 groups of images.
|
|
|
|
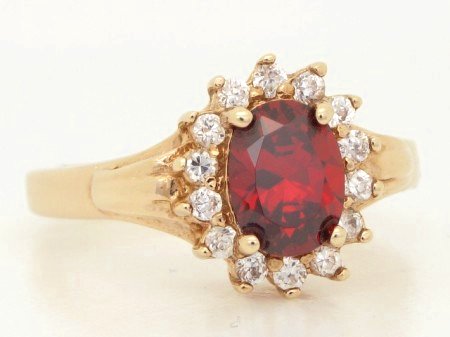
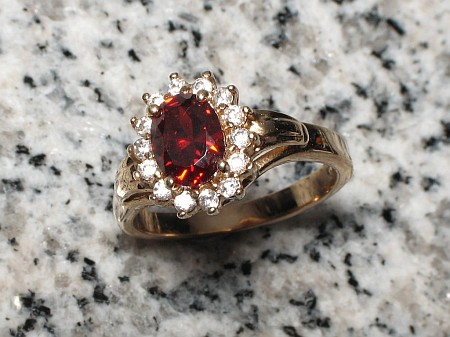
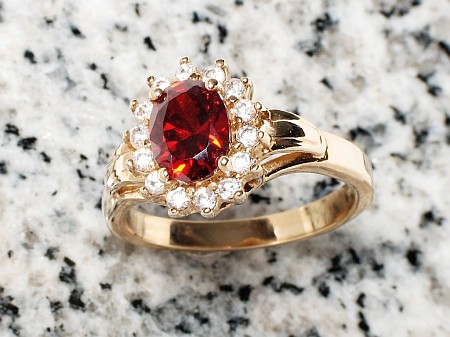
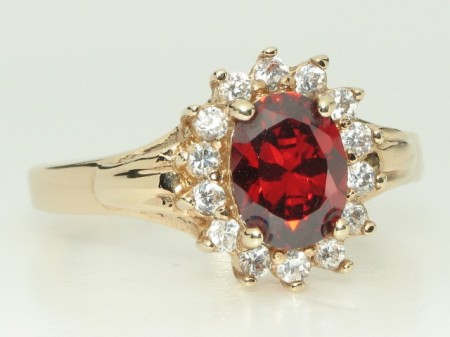
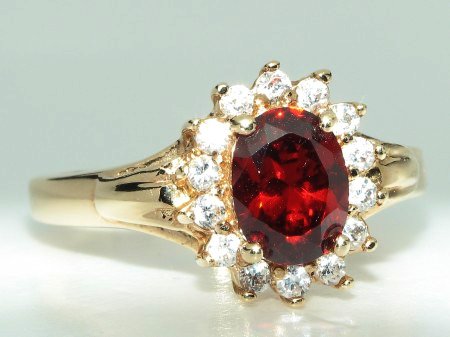
This image was taken as above but here I used the flash. I had no diffuser on the camera but the flash fired through the piece of paper so it was diffused before it hit the bowls where it was further diffused. As you can see, the flash helps bring out the brilliance of the stones but with virtually no reflections on the gold, the band looks uninteresting.
|
|
|
|
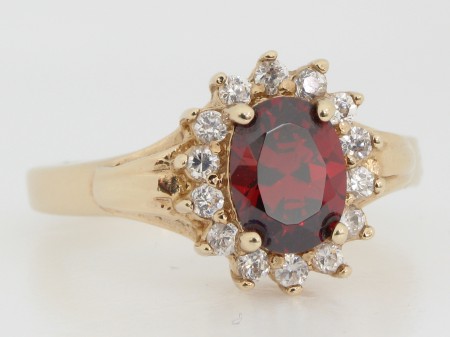
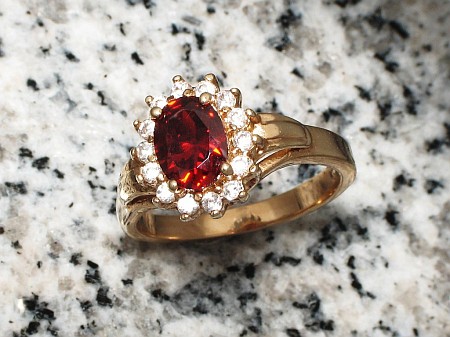
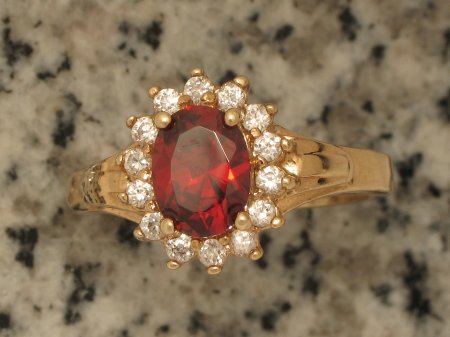
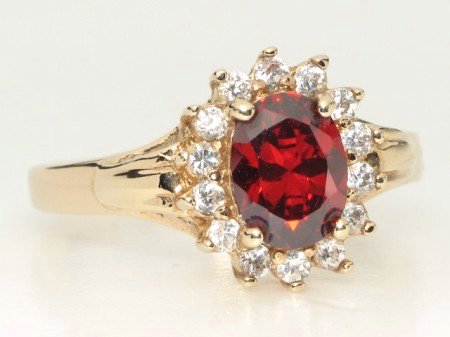
This was taken with the same setup as the previous image but I cut the top off of the paper so the flash could fire directly on the bowl. It's just a bit overexposed. This could have been prevented with an additional diffuser or by blocking part of the light. I could have set the flash power lower but on this camera, there are only 3 choices for flash output when using the manual setting on the camera and the next lower would have been too dark.
|
|
|
|
Here, I removed the piece of paper so the camera's dark reflection can be seen in some areas of the ring. No flash was used here.
|
|
|
|
An important tip... When you make modifications to an image, always modify a copy of the original. Save the copy with the same basic file name but add a letter or number to it (IMG_1000.JPG becomes IMG_1000B.JPG). Make the copy with the new file name before opening the image in an editor (Photoshop, the GIMP...). This will prevent you from destroying the original image if you make a mistake.
|
|
|
|
|
|
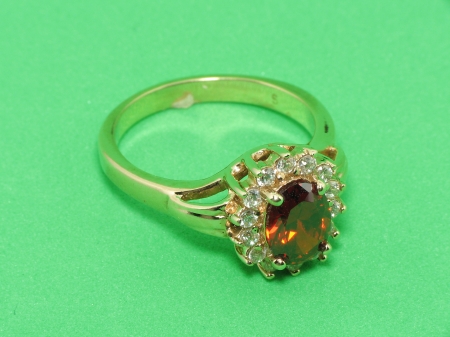
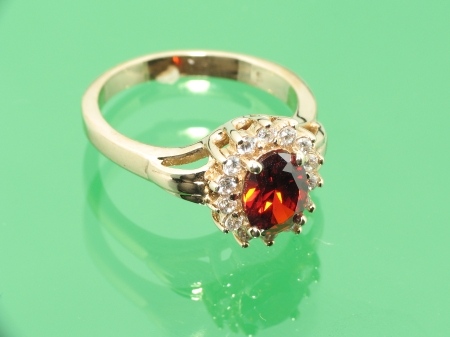
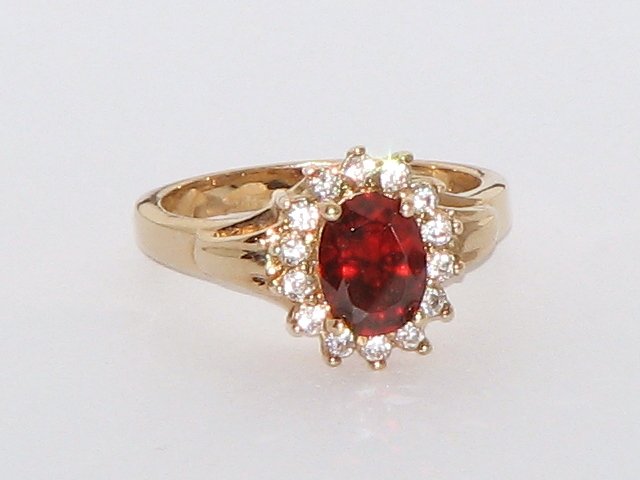
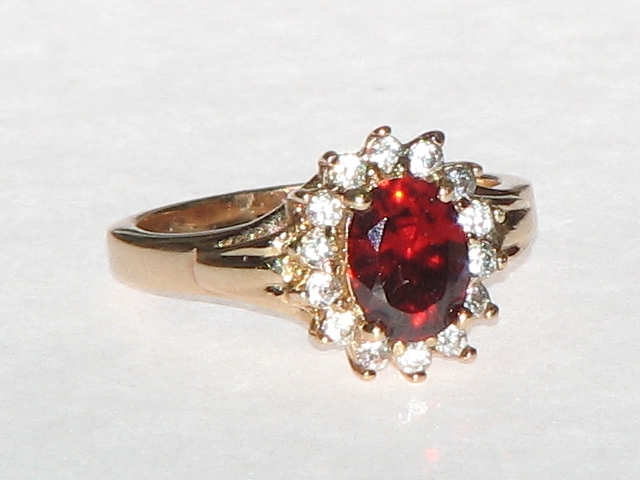
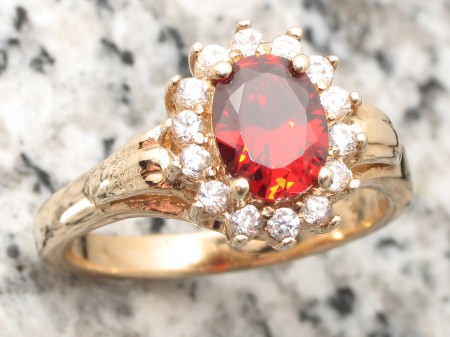
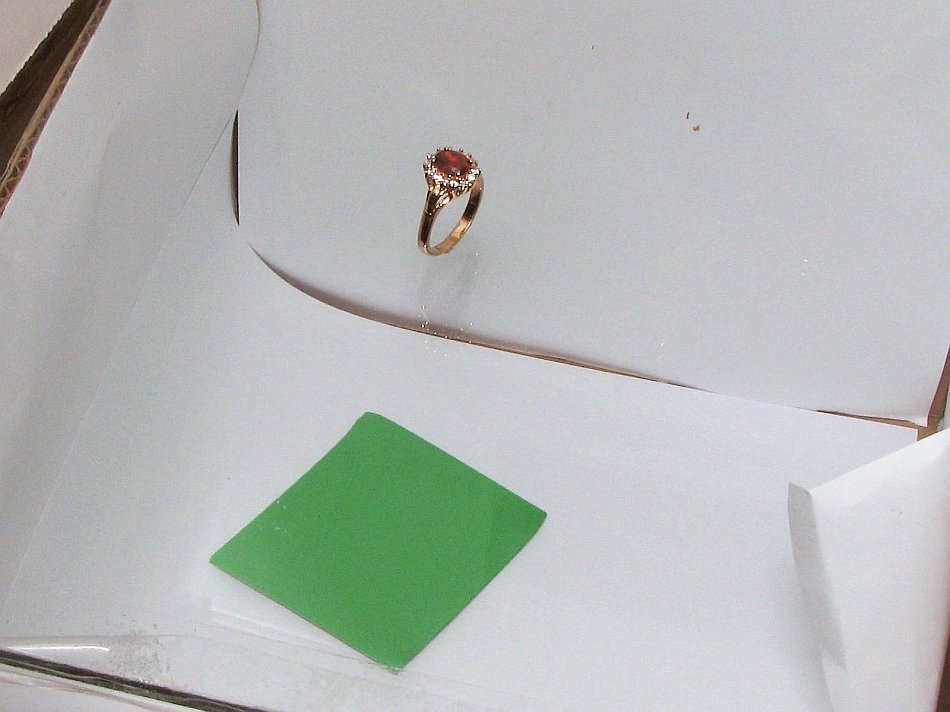
If you want to use a colored background or surface for this type of item, it won't work well if it's resting directly on the colored surface (above). The color from the surface reflects onto the item and, in this case, makes it look really bad. If you have the item above the surface (here it's on the glass we used for the light table), the colored surface is too far away to reflect onto the item (for the most part, anyway). The item above and to the right looks much better (in my opinion). These images were only cropped and resized. They were not manipulated in any other way. The image below/left has a bit of color contamination. This can be significantly reduced if the background is repositioned or if the size of the colored background is reduced. This is what the setup looks like.
|
More photos and information on this type of setup are here.
|
|

|
If you don't have a close-up lens, you can still take passable photos. This photo was taken with no close-up lens. The stage was simply a piece of white paper. There are harsh shadows and reflections but if that's not a concern, it may be all you need.
|
|
This photo was taken as the one above but I placed a reflective surround/partial enclosure (similar to this) over it.
|
|
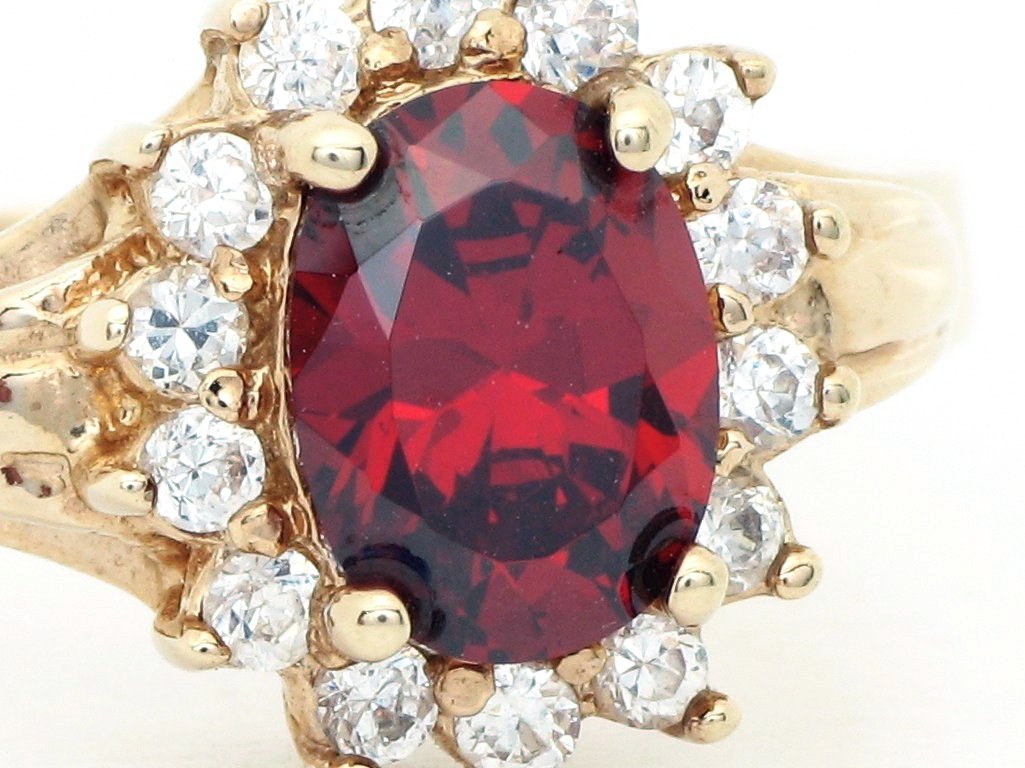
This photo was taken on the light table shown on this page. There was no reflector above the table. These photos (without the close-up lenses) aren't too bad. The biggest problem is the size of the image. What's shown here is the full size image of the ring. The photos with the close-up lens are significantly larger and can therefore show much more detail. For this and the two previous images, I was about 6 feet from the ring. The flash was fired at full power. For comparison, this is a full size crop of the ring taken with the close-up lens.
|
Notes:
- Photos taken with high magnification show every tiny bit of dust, dirt and fingerprints.
- To clean something like this ring, a microfiber cloth works well.
- To remove dust, you can use compressed gas dusters.
- To prevent fingerprints, you should wear vinyl or latex gloves.
|
|
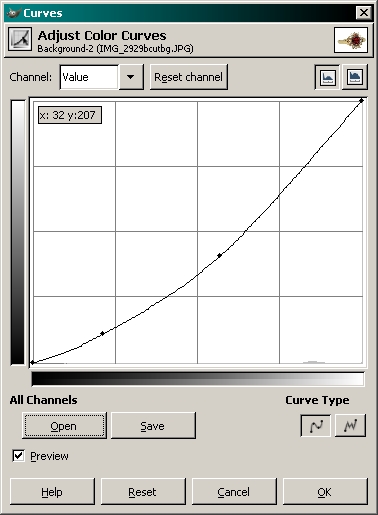
The following two photos are a bit different in that they were taken with the ring standing vertically. The left image is as it came from the camera. On the right, I used the curves tool in the GIMP to increase the overall contrast a bit. The ring is being held up by holding wax. It's available on eBay. When they suggest that you only need a tiny piece to hold the ring, they mean it. It holds better on smooth, hard surfaces. If applied to paper (or similar material), it may damage the surface when removing it. This is a photo of the setup. I used a styrofoam cup diffuser on the flash.
|
|
|
|
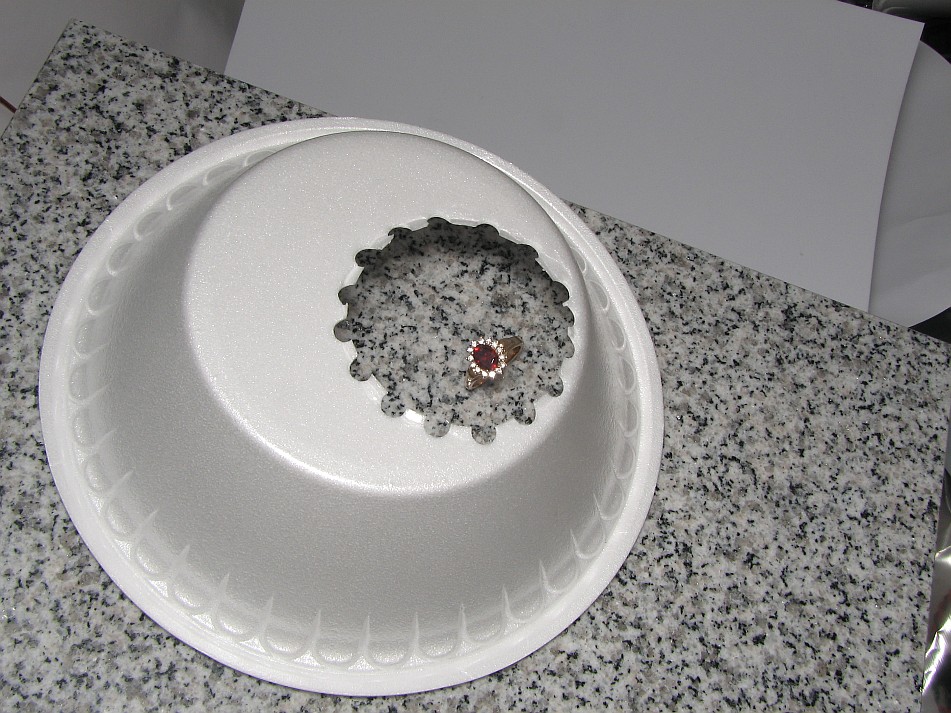
In the previous images, I had a tough time trying to get rid of the white glare on the flats of the stone. To prevent this, I needed something that would help promote light distribution but only from the sides. Since the top of the stone didn't have any reflections from the white reflective surface, the stone doesn't look washed out (on the face of the red stone). The brilliance of the stone in the previous images is better but that's almost entirely due to angle of the camera with respect to the stone. This is a photo of the setup. I used a styrofoam bowl diffuser on the flash (flat, not around the adapter). The image on the right (below) is the same but I didn't use the bowl around the ring. The second row shows the same images after using the curves tool in the GIMP.
|
|
|
|
|
|
This is essentially the same setup as above but I flipped the bowl to see the difference in the lighting. It seemed to be better this way. The left image is without modification. I used the curves tool in GIMP on the right image. This is a photo of the setup.
|
|
|
|
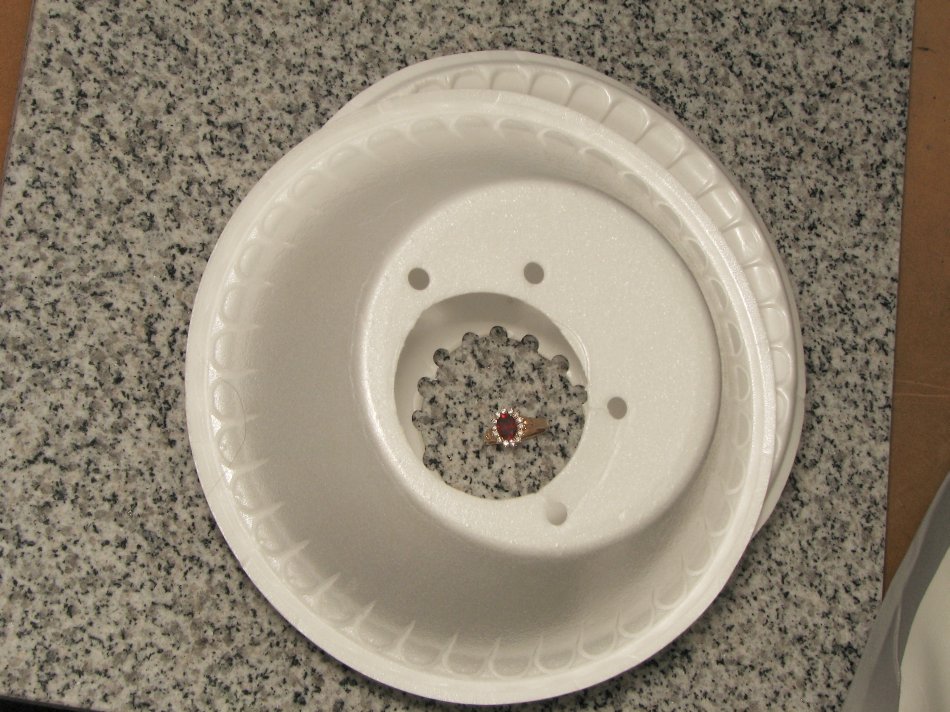
This uses two styrofoam bowls (originally diffusers cut to fit onto the lens adapter). I used a styrofoam cup as a diffuser on the flash. The results are about the same as the images above. As you can see, the white balance is quite different from above. In the previous images, I used the auto white balance setting. Here, I used the 'flash' setting. Even though I used the flash for the light source, the color isn't quite right. This is probably due to the diffusers shifting the color balance slightly. Using the auto or custom white balance will generally provide better color balance if the diffusers are causing problems. The image on the left is as it came from the camera. On the right, I used the gamma and contrast tools in IrfanView to lighten it a bit. This is a photo of the setup.
|
|
|
|
This is a similar setup but I've cut the bottom out of the top bowl to prevent the bowl from reflecting in the stone (which washed it out). I also used a different diffuser on the flash because I wanted a bit more light. At this close working distance, this diffuser transmitted a bit too much light so I had to place a piece of black foam directly in front of the flash lens. I also used a custom white balance. I tried setting the white balance on an 18% gray cloth but the camera couldn't get it right. I then used the background to set the white balance and, after a few tries, I had the correct white balance. This is a photo of the setup (including the diffuser and the lens -- A Raynox DCR-250 on a LensMate adapter). Again, the left image is as it came from the camera. The right image is after the curves tool in the GIMP was applied to it. In my opinion, the left image was probably good enough for most purposes but the right image is just a bit better.
|

|
|
|
I know a lot of people will scoff at the idea of using styrofoam cups and bowls for photography. What you use to get the photo isn't important. Only the results are important. Using the methods here, you can learn what works best for you and it won't cost more than a couple of bucks. For those who are good photographers but don't have a big budget, they will be able to do quite well using lighting methods similar to these. If you decide that you want to get more serious about jewelry photography, you may want to look into commercially available light tents and boxes.
|
|
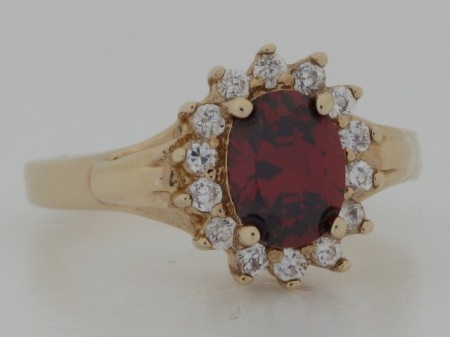
A note about the ring. It's an inexpensive piece of jewelry I purchased just for this page. It cost less than $30US including shipping. You're likely to have better results with high quality jewelry.
|
|